Upload Data
To upload data into proxl, the data must first be converted into proxl XML then uploaded via the proxl web site.
Convert output to proxl XML
Converters have been developed for several cross-linking proteomics pipelines. Click on the name of the software, below, to download and learn more about the respective converter.
If you are using one of the software packages listed above, download the runnable file and follow its instructions to convert your data to proxl XML. If you encounter any issues or have any questions running any of these software, please email us at mriffle@uw.edu.
If you are not using one of the software packages listed above, please visit our Proxl XML Converter Development Guide page for information about how to develop a converter. We are happy to answer any questions, or work with you directly on the development of any new converter.
Import Data
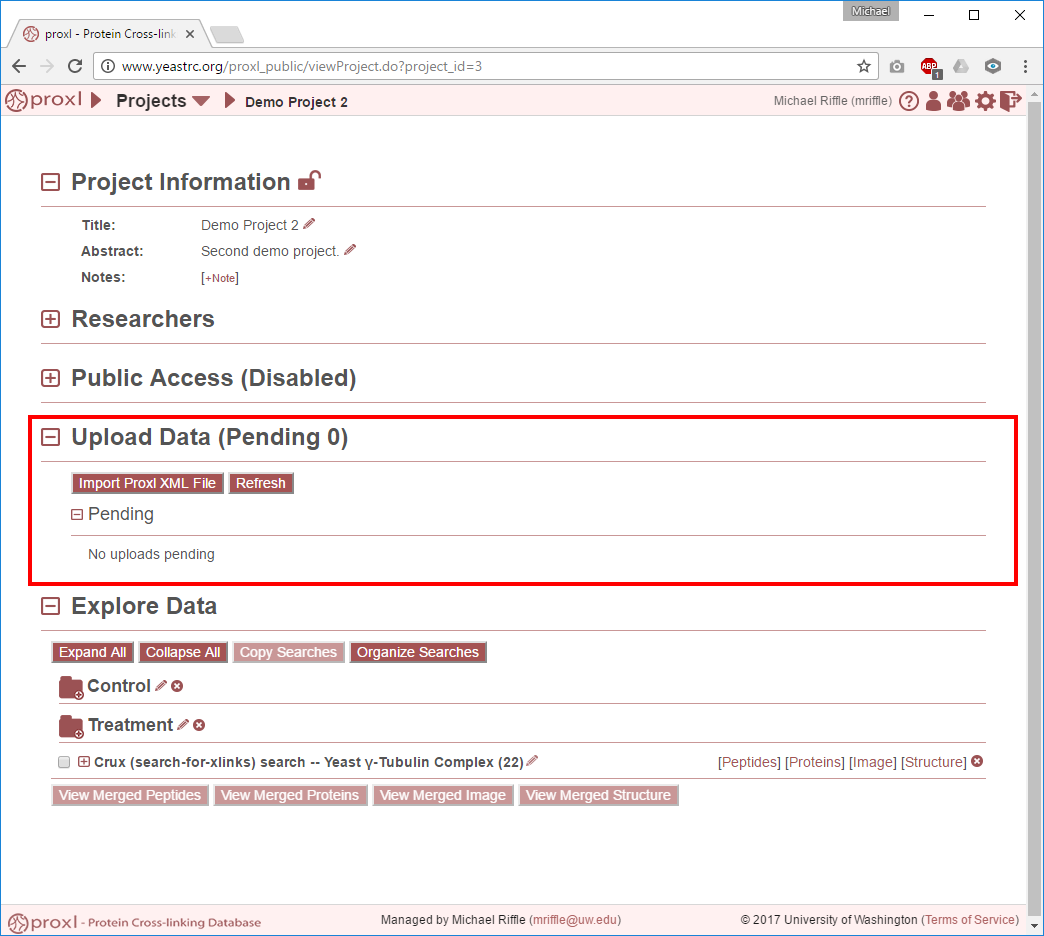
Click the [+] icon next to “Upload Data” on the project overview page to expand the data upload section and view upload status.
To upload a proxl XML file, click the “Import Proxl XML File” button:
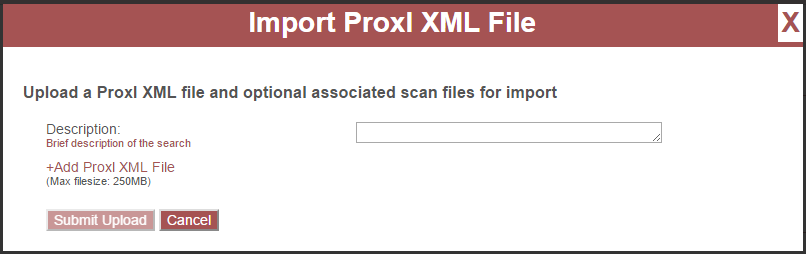
Add a description for the search (may be edited later), and click the “+Add Proxl XML File” link to initiate a file selection dialog. Select the proxl XML file you would like to upload. You will see the following:
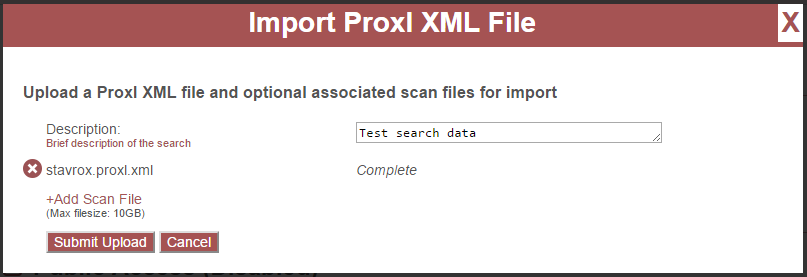
Below the description, the file name of the uploaded proxl XML file is given. The red “X” icon may be clicked to delete that file and upload a different one. To the right of the file name is the upload status.
Below the file name is a link labeled “+Add Scan File”. This may be used to optionally upload a mzML or mzXML file (or multiple files) containing the scan data that was searched. Viewing spectra associated with PSMs is only available if a scan file is uploaded with the proxl XML file.
Clicking the “+Add Scan File” link opens a file selection dialog. Upon selecting a file, it will begin uploading to the server–a progress bar will be visible. Once the upload is complete, you will see the following:
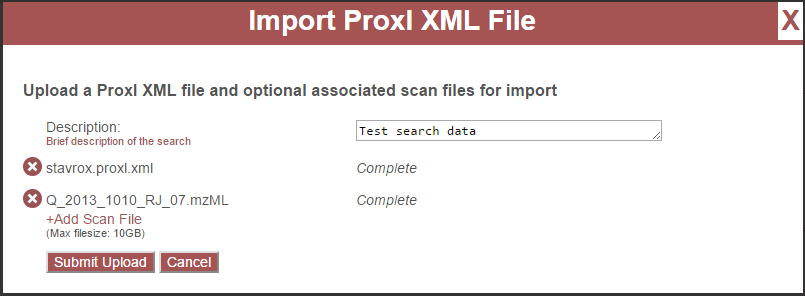
To deleted an uploaded scan file, click the “X” icon next to its file name. If multiple scan files were used in the search, you may continue to upload additional scan files by clicking the “+Add Scan File” link.
To submit the data to proxl for processing and import, click the “Submit Upload” button.
Import Status
If not expanded, click the [+] icon next to “Upload Data” on the project overview page to expand the data upload section and view upload status.
The number of pending queued uploads for this project is listed next to the “Upload Data” section header. The pending uploads are listed individually under the “Pending” section of the “Upload Data” section:

Clicking the “X” icon will remove this upload from the queue, effectively canceling the upload. This is only available if processing of this upload request has not yet begun.
Once completed, the upload will be moved from the “Pending” list to the “History” list, and the data for the new upload will be available in the “Explore Data” section:
